How to Make Carving Tools on the Cheap
Part 1: Chisels
[see below for Part 2: Mallets]
As with a lot of specialized trades, just knowing where to get the right tools if half the battle– the other half is finding a lending company to take out the loan required to purchase trade specific equipment.
I should say that, as a professional user of chisels, I am spoiled. I only use carbide tipped chisels. In my opinion, straight-steel chisel for anything other than alabaster and talc are a waste of time. I want to spend more time carving and less time sharpening. Anyone that has ever been an apprentice has spent plenty of time sharpening chisels… so I’m over it. I have always been happy to spend the money on a chisel that will hold it’s edge for a decent period of time–particularly with marble and limestone, with granite — all bets are off; break out the bench grinder.
However, if one finds themselves in need of lots of such tools for educational programs with no budget, as I recently have, then this issue of expensive tools can be a real problem– especially if you want “good” tools.
For doing workshops on letter carving, which requires a small but very precise edge, I wanted to have a set of chisels for the entire class that would stay sharp. This would cause less frustration for beginners, who are given to frustration with processes that do not include a touch-screen… So I needed to do some hunting.
The main thing was to find chisels that had “carbide” tips. I have played with the process of making my own chisels from scratch, but I’m not a blacksmith and I don’t have the proper set up for that kind of metal work. So I needed something that already had carbides at a price that wouldn’t make me seize. Obviously, I went online, but even the cheapest carbide chisels for hand hammers (meaning without turned shanks for use with air hammers) were pretty expensive both individually and in packs.
Eventually, I found an affordable price on “Superior Tile Cutter” carbide-tipped-chisels on Grainger’s site, with has a location near my shop. So I ordered a couple and picked them up few days later. Turns out they were just what I was looking for– with a few idiosyncrasies. But, having gotten the chisels in their original manufacturer’s pacaging was key. Turns out that they are made by the Kraft Tool Company in the good old U-S-of-A, specifically–Kansas. Kraft (like the dinner, but not) has a website where I found the same chisels being sold for a few bucks less each!
http://www.krafttool.com/products/by-category/superior-tile/chisels
The kind of chisels I wanted for the relatively small letters I’d be focusing on were the 6″ Carbide Chisel w/1/4″ Wide Tip, Product #: ST030, currently priced at $7.90 a piece. This is at least 3 times less than a chisel of a similar size from a carving specific store or [shudders] an “Art Store…”
To Kraft Tools great credit, their customer service is awesome and when I called them and explained why I needed to buy in bulk, because I was doing a workshop with a non-profit, public school in Baltimore, (and provided all of the relevant documentation, of course) they worked with me to get an even better deal. Thanks, Kraft Tool!
The rub– these chisels do require a bit of “after-market” modification to be made ideal for stone carving. They are intended for tile work, so for reasons that I don’t fully understand the carbide tip is inserted into the steel shank at an angle, instead of directly in the middle, as with a stone carving chisel. This is odd, but, since only the very edge of the carving blade is used when carving, this really doesn’t matter as long as the proper angle away from the edge of the blade can be achieved. So this means a fair bit of time with the bench grinder and a bluestone wheel (I’m still using the set that came with the bench grinder, so nothing special there).
So, as long as you are wiling to put in a little elbow grease, tapering the tips of the relatively blunt “tile” chisels– then you an make a real nice point that can be honed with a diamond block. Remember to douse your chisel in cool water periodically when grinding to prevent over heating! Also, for comfort, you could lightly ease the lengthwise corners along the 1/4″ shank. (the larger sizes, 3/8″ & 1/2″ chisels are made from hex-stock) This relatively small amount of work yields a very passable, novice-grade chisel at a student grade-price.
Modifications — I will probably be buying a lot more of the chisels soon, since I do a lot of making my own chisels profiles too, I rarely buy a chisel that is anything other than flat bladed. I make the rounds and cut the teeth myself as needed. This allows me control over the final shape of the blade and thus the texture. I have to say, when trying to make the proper profile for a texture I am working on, I would be a lot more comfortable experimenting with a chisel that chisel cost less than ten dollars that one that cost 40… Also, if you wants to make these chisels work for a pneumatic hammer, the
1/4″ stock can be milled down by just grinding off the corners of the lower 2 inches of the chisel.
For a pneumatic air hammer to accept the shank of a chisel it doesn’t need to be perfectly round. It just needs be small enough in width & depth to be inscribed within the inner radius of the opening of the hammer. For instance, a ground down 1/4″ Kraft Tool chisel fits the Trow& Holden Bantam Air Hammer. If I had a lathe this would be very easy– but I don’t… so I have to eyeball it on the bench grinder. Grinding the corners evenly, giving it radial symmetry, doesn’t need to be done perfectly, but it improves stability and makes the chisel easier to control while carving. So again, if you are willing to put in the time, you can make a pile of carbide tipped, pneumatic compatible chisels for dozens rather than hundreds of dollars.
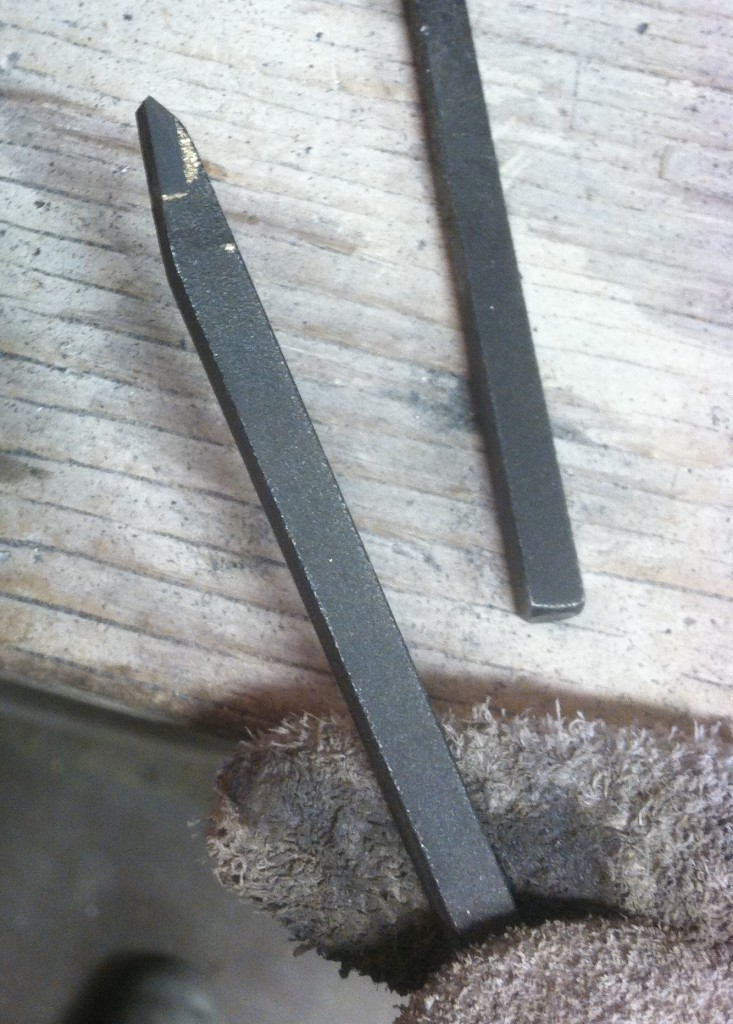
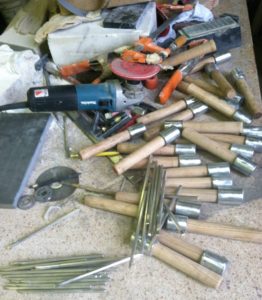
1/4 in. carbide-tipped tile chisel
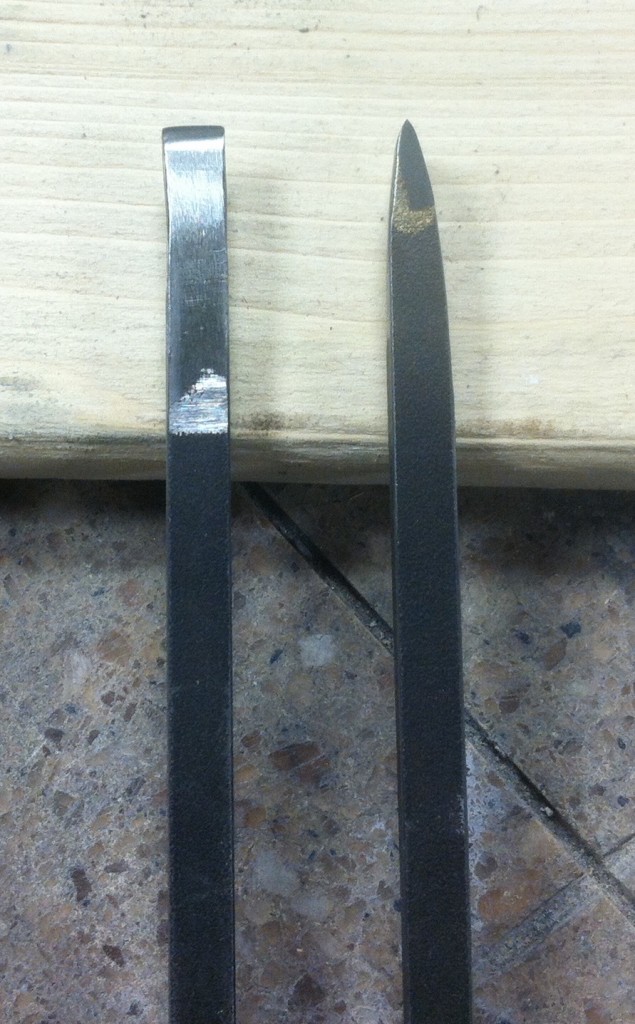
ground carbide-tipped tile chisel
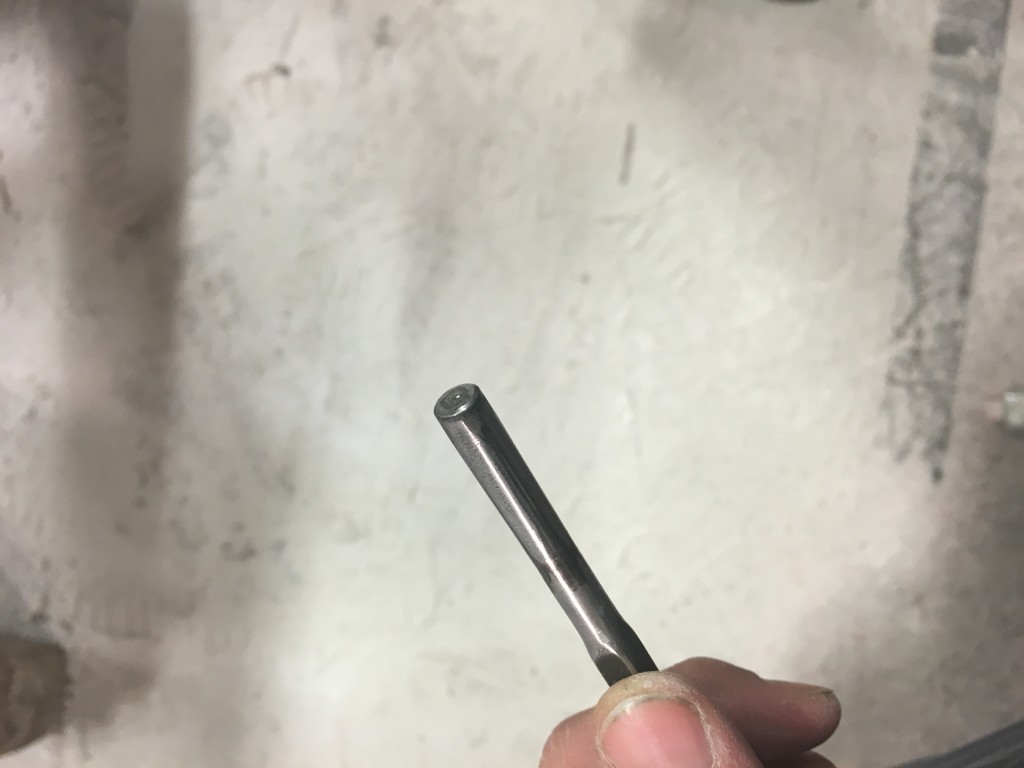
1/4 in. chisel for use with pneumatic air hammer
Part 2: Mallets
Homemade Mallets
So, for the last few years I’ve done several stone carving workshops and demonstrations. This led me to think a lot about the tools I used and their accessibility—or lack thereof. The truth is that carving tools cost—a lot.
This is one of the things that make interactive demonstrations cool, because people can use the tools and materials, briefly, and get a taste for the craft. No commitment, no cost. However, when contemplating a class, the issue of tools and materials looms large. Anything purchase from an “art store” or any craft-specific source tends to be pricey, stone tools are no exception. They are particularly expensive not only because they do need to be made of quality materials so that they last—also the relative short list of stone-specific-tool-makers keeps the prices high.
So when I decided to do a periodic workshop with a local public school in my neighborhood, cost was one of the first issues. I wanted to be able to provide the students with tools that were as close to professional grade—with no budget. Since all cost would be on Sebastianwork.com, I had to get creative.
One of the most unique and important tools is the mallet/hammer. The only kind of hammers that people are going to find cheap and easy at a hardware store are the standard framing or claw hammers—not good for carving. I use both flat and round hammers to carve with depending on the size of the details and the type of stone.
Many dual directional masons hammers from stone specific suppliers, though beautiful, top $50 bucks. Many carvers favor round mallets, like the kind I use for wood carving. Cost is anywhere from $15 to $50 + shipping.
Technically one could just use a piece of wood, but wood gets chewed up pretty fast when striking a harder material. The wood needs metal jacketing. But most of the mallets sold are actually on the heavy side for small carving anyway, especially for beginners, especially if you are focusing on small lettering.
The most important factor is not really weight but velocity and efficiency, a two small but strong pieces of metal striking one another produces A LOT of force. This is why I like a wood AND metal mallet rather than just wood.
Here’s how I made enough mallets for a class of 15 for under $30. It wasn’t super efficient at the first attempt, but it was realtively quick and easy. And while they are not fancy, but I quite like them and have been using them myself for a while now. It doesn’t hurt that the shopping list is two items long (I shopped at Lowes).
What to Get:
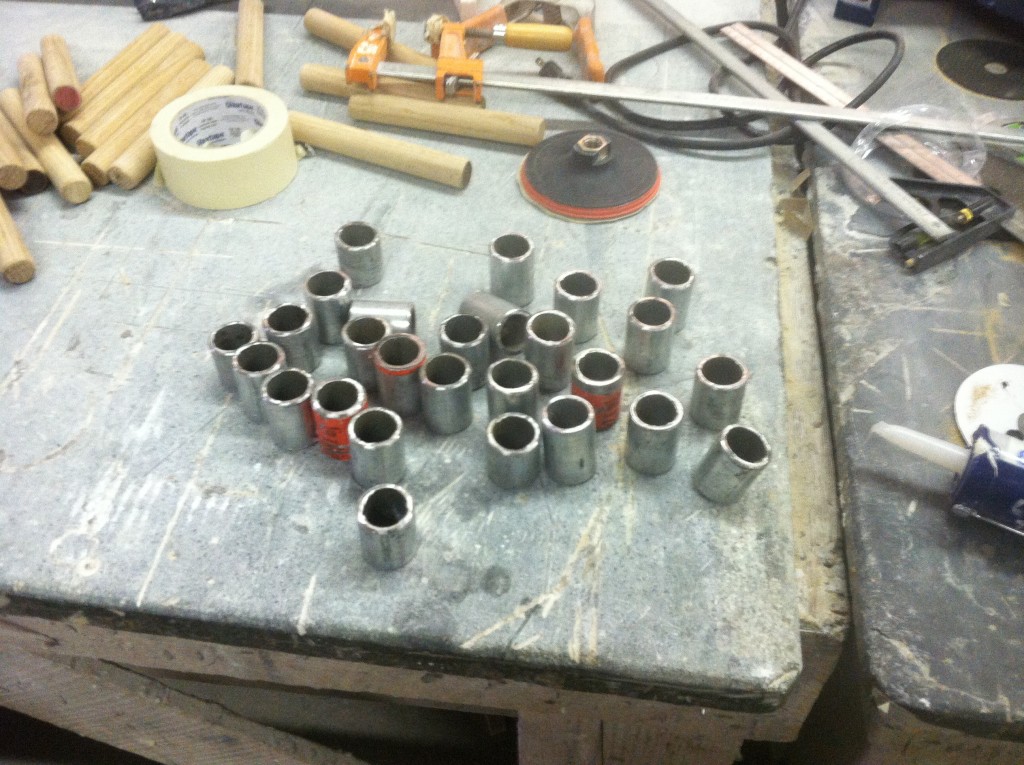
- 3 oak dowels (36″long x 1″ diameter) — about $5 each
- 1 galvanized pipe (24″ x 1″ inner diameter) – about $12
How to assemble:
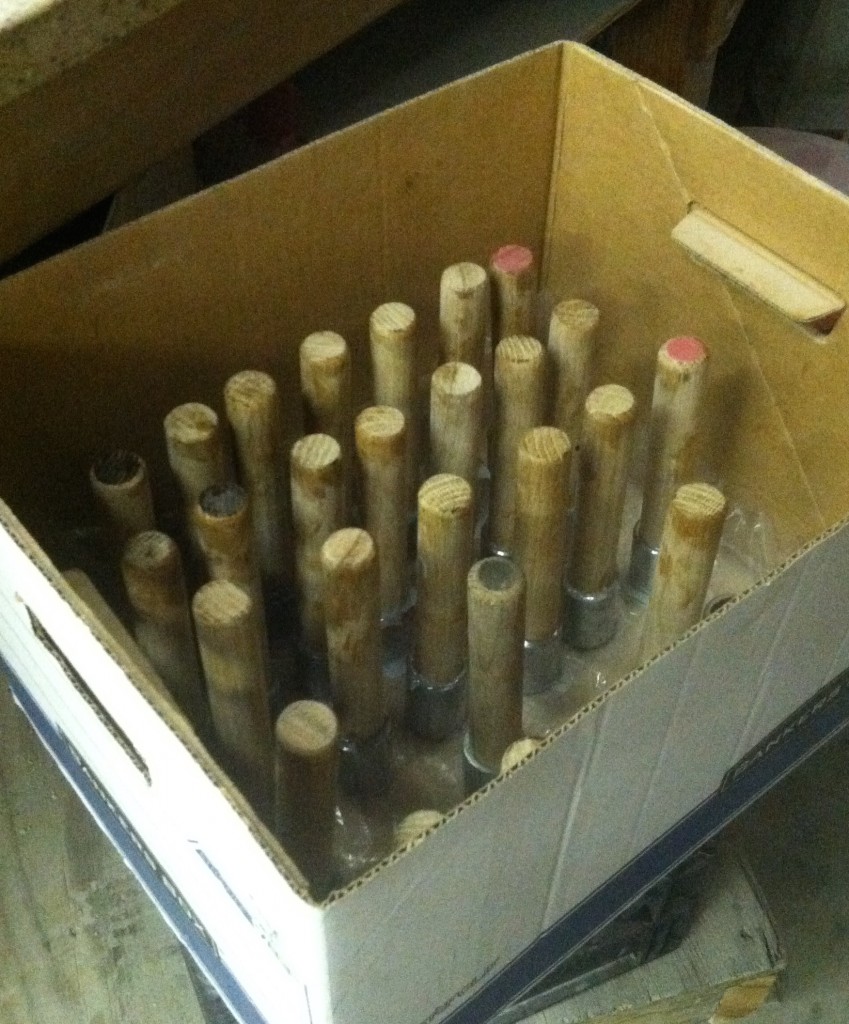
- Cut wooden dowels to 7.25″ lengths.
- Cut threaded ends off of pipe. This leaves approx. 22″ Cut remainder to approx 1.375″ lengths.
- Place the pipe around the end of the cut dowel.
- Drive in screws or nails to expand end of wood agains the interior of the pipe. You can add adhesive (resin or glue), both to in interior of the pipe and around seams/cracks after driving the nails to lock everything in.
- Let set over night.
- Sand off any splinters/burrs or excess glue. Wax or oil the whole thing to seal & prevent oxidization.
- Bake at 350 degrees for 2 hours . . .
- Done.
- Makes 15 mallets. Total cost: $27. Cost per: approx $1.80
Modifications — if you want more power — you could use larger size dowel and pipe and turn the dowel for ergonomic grip. Or make handle longer for better swing/velocity. Or add and additional jacket of 1.25″ pipe on top of the 1″ pipe for more weight. But the 6.75″ x 1″ mallets should be fine for soft stone and detailed work and after several months of some serious abuse, they have held up extremely well.
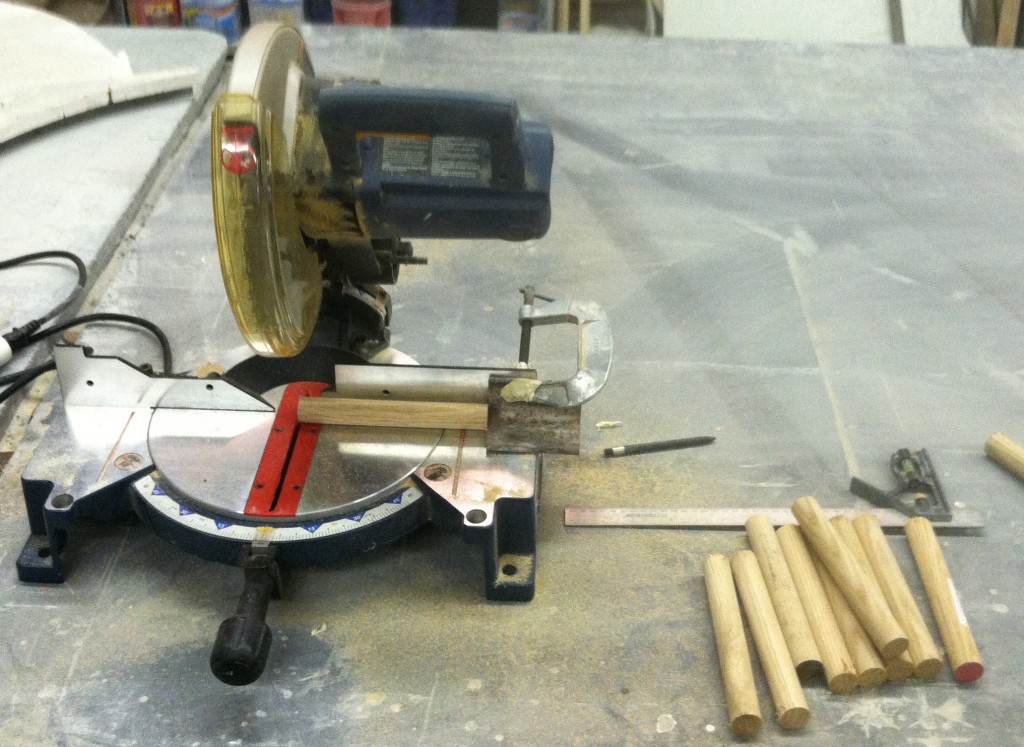
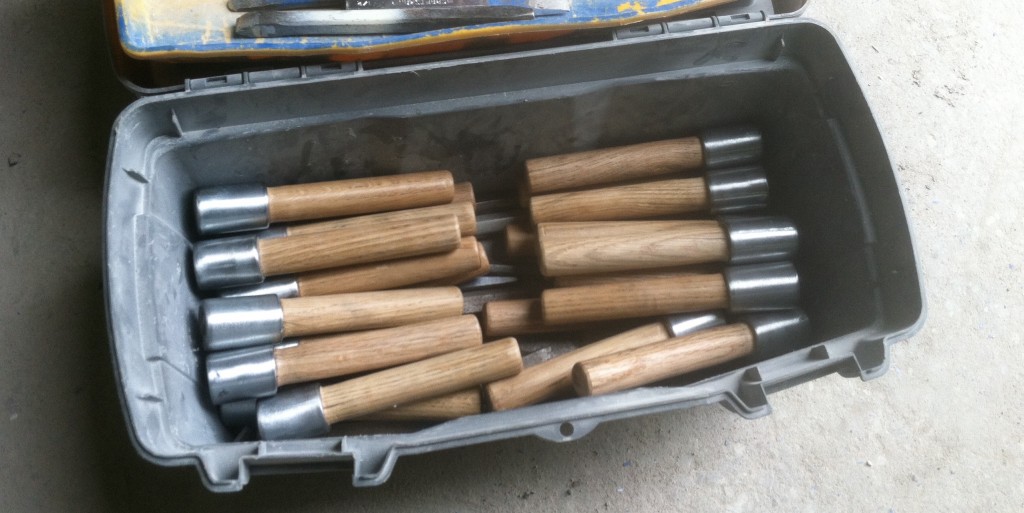
Wooden Dowels Being Cut
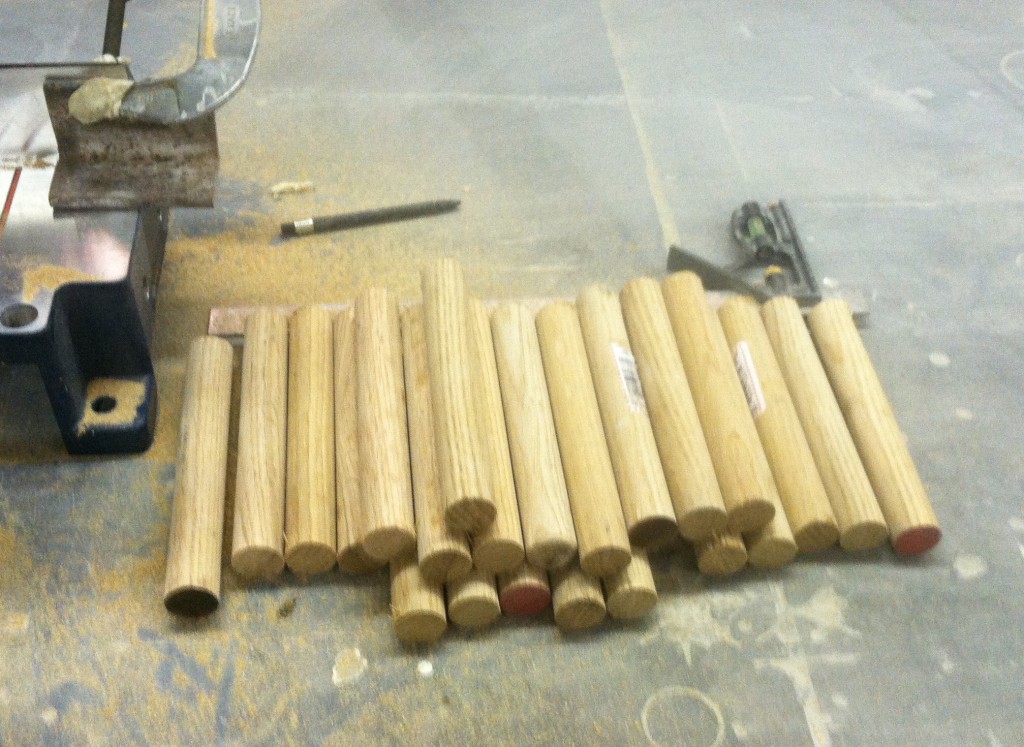
Wooden Dowels

Wooden Dowels Being Sanded
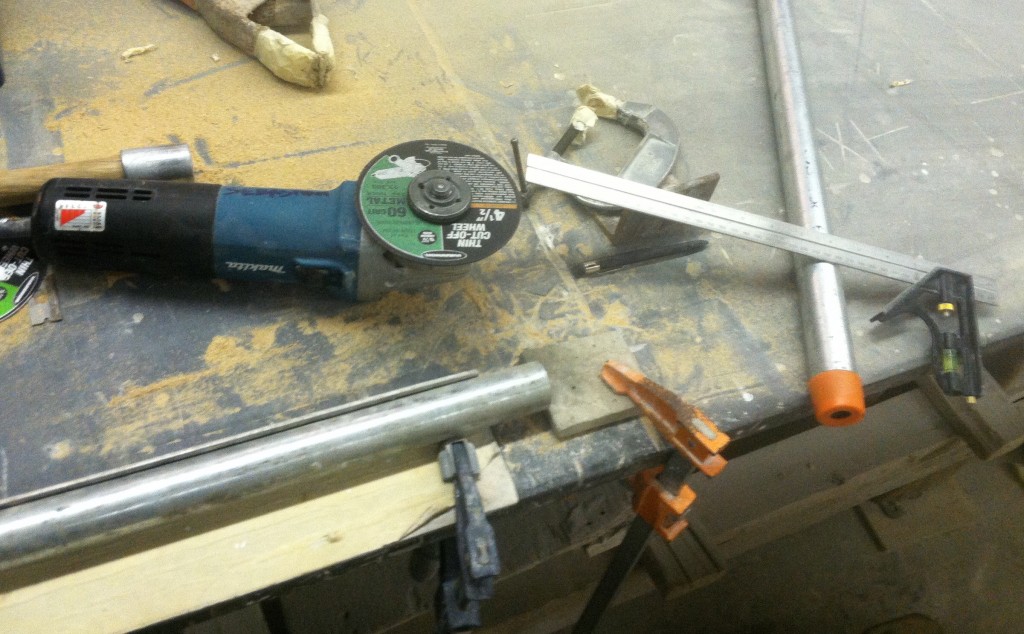
Homemade Jig for Cutting
Pipe Sections for Mallets
Mallets Setting Overnight

Mallet with beeswax coating